Have you ever had that moment? That sudden “Oh, I need to record my screen *right now*”? Maybe you’re a student trying to save a key part of a live lecture. Maybe you’re building a tutorial for your YouTube channel or walking a relative through a tech issue from miles away. Perhaps you’re a gamer who just pulled off an epic play or a professional needing to demo software for your team. The need hits instantly, but the solution seems like it’s going to be complicated or expensive. A quick search bombards you with options: pricey software, free trials that slap a giant watermark on your video, and sketchy downloads that probably come with a free virus.
It’s a frustrating spot to be in. You have this powerful laptop, a machine capable of amazing things, yet this seemingly simple task feels locked behind a paywall or a steep technical learning curve. You don’t have a budget for this, and you definitely don’t have time to become a video expert overnight. You just need to capture your screen, cleanly and for free.
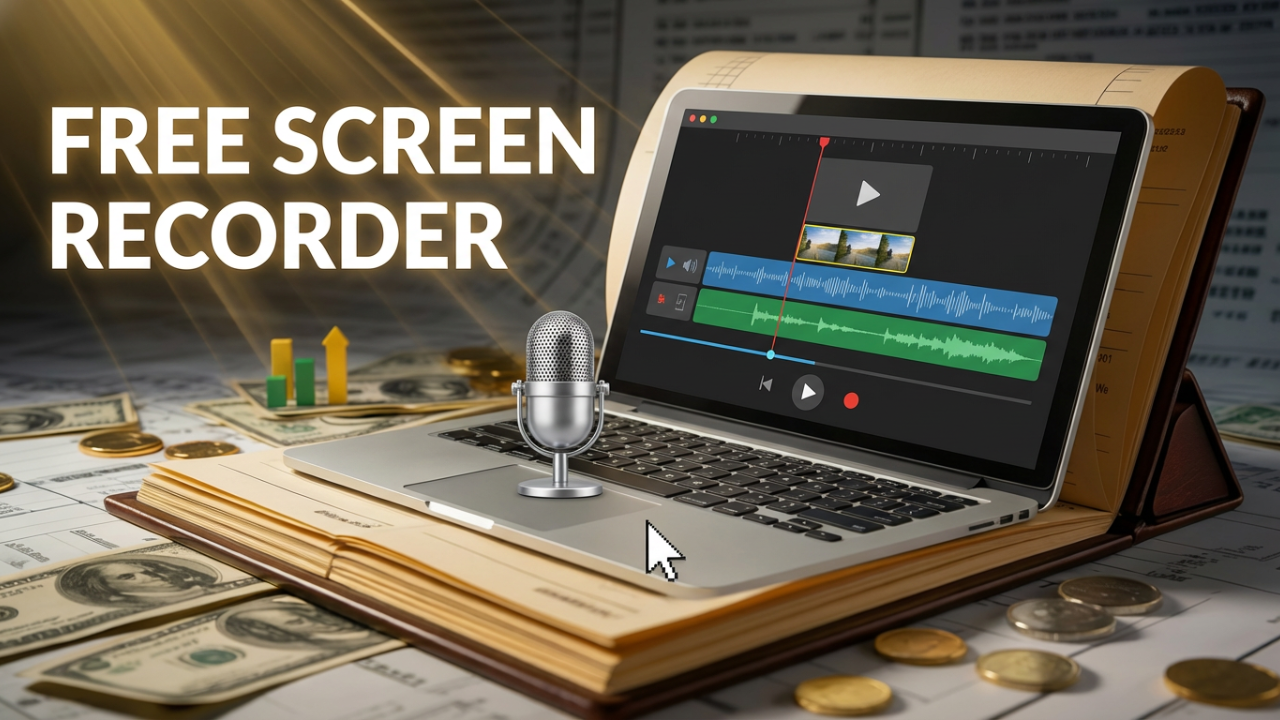
Well, in the next few minutes, I’m going to solve that problem for you. This isn’t just another top-five list. This is your definitive guide. I’m going to show you the powerful, hidden screen recorders that are *already built into* your Windows, Mac, or Chromebook laptop. No downloads, no sign-ups, and no cost. Then, for those who want to level up, I’ll walk you through the single best, most powerful, and 100% free professional-grade software that creators and streamers use every day. By the end of this article, you will be able to screen record whatever you want, with or without your voice and webcam, without ever spending a dime. Let’s get it solved.

ILIPUTER- International Computer Manufacturing Co.
Section 1: The Philosophy of “Free” – What to Watch Out For
Before we start clicking buttons, let’s talk about the word “free.” In the software world, “free” can mean a lot of different things, and knowing the difference will save you a ton of headaches.
First, there’s **Truly Free** software. This is the gold standard. These are tools given to you with no major strings attached. They don’t add watermarks, they don’t have recording time limits, and their core features are all available from the start. The built-in tools on your laptop fall into this category—they came with the operating system, and you can use them as much as you want. The other big player here is open-source software. OBS Studio, which we’ll cover later, is the perfect example. It’s built by a community of volunteers and is free forever, often with more power than most paid programs.
Then, there’s the more common model: **Freemium**. It’s a mashup of “free” and “premium.” These apps lure you in with a free version that is deliberately limited. The whole point is to get you to upgrade to a paid plan. The most common limitations are watermarks—that annoying logo they burn into your video—and time limits. Many free recorders will cut you off after 5 or 10 minutes, making them useless for a long meeting or a full tutorial. Finally, they’ll often cap the recording quality at a blurry 720p, locking that crisp 1080p or 4K quality behind a paywall.
So, why would anyone use Freemium tools? Sometimes, they offer incredible convenience. Tools like Loom are masters of this. Their free plans have limits, but they are incredibly fast for recording and sharing a quick video with a link. They’re built for speed.
In this guide, we’re focusing on the **Truly Free** options. The goal is to give you tools that won’t hold your videos hostage. We’ll start with the built-in recorders because they’re the absolute fastest and safest way to get started. Then, we’ll graduate to OBS Studio, a tool so powerful you may never need anything else. Understanding this distinction is your first step to becoming self-sufficient in screen recording. Now, let’s get into the tools, starting with Windows.
Section 2: How To Screen Record on Windows For Free
If you have a laptop running Windows 10 or Windows 11, you actually have two great, completely free screen recorders already installed. You just need to know where to find them.
**Part 2.1: The Modern Method – The Snipping Tool (Windows 11 and recent Windows 10)**
For years, the Snipping Tool was just for screenshots. But recently, Microsoft gave it a huge upgrade, adding a fantastic video recording feature. It’s clean, simple, and my top pick for most quick recording tasks on a modern Windows machine.
So, how do you open it? The easiest way is to just open your Start Menu and type “Snipping Tool.” Once it launches, you’ll see the familiar screenshot UI. Look for the little movie camera icon and click it to switch into video mode.
Now, click the “+ New” button. Your screen will dim, and a small toolbar will appear at the top. Use your mouse to click and drag a box around the specific part of the screen you want to record. This is perfect if you only want to show one window.
Next, look at the toolbar for the microphone icon. This controls your voice from your laptop’s built-in mic or a headset. If you want to narrate your video, click this to turn it on. A key limitation to know is that the Snipping Tool does **not** have a built-in button to capture system audio—that is, the sounds coming from your computer, like a YouTube video or game audio. For that, you’ll need the other tool we’re about to cover.
Once your area is selected and your mic is set, hit the red “Start” button. You’ll get a 3-second countdown, and the recording will begin. When you’re done, click the stop button. The Snipping Tool will pop open with your video, ready to play back. You can even trim the beginning and end right there. When you’re happy, just hit save, and you’ll have a standard MP4 file. The Snipping Tool is brilliant for its simplicity, but it can’t record your webcam or system audio.
**Part 2.2: The Classic Method – The Xbox Game Bar (Windows 10 and 11)**
Before the Snipping Tool got its video upgrade, the Xbox Game Bar was the go-to hidden recorder in Windows. It was designed for gaming, but it works for almost anything.
To open it, press the **Windows key + G**. An overlay with several windows, or “widgets,” will appear. Look for the one labeled “Capture.” If you don’t see it, you can enable it from the main menu bar at the top.
In the Capture widget, you’ll see a record button. But an even faster way is to use the universal shortcut: **Windows key + Alt + R**. This shortcut will start or stop a recording of your active window at any time, without even opening the Game Bar overlay. This is also how you capture system audio.
But here’s the critical limitation: the Game Bar is designed to record a single application at a time. It will **not** record your Windows Desktop or File Explorer. If you try the shortcut on your desktop, you’ll get an error message. This makes it perfect for recording a PowerPoint, a web browser, or a single program, but not for showing yourself navigating between different folders.
When you stop recording, your videos are automatically saved as MP4s in a folder called “Captures” inside your main “Videos” folder.
So, when should you use Game Bar? If you need to record system audio or if you’re on an older version of Windows 10 that doesn’t have the new Snipping Tool, Game Bar is your best built-in choice. But for general recording on a modern machine, the Snipping Tool is more flexible because it can record any part of your screen, including the desktop.
Section 3: How to Screen Record on a Mac For Free
Mac users, you’re in luck. For years, macOS has included one of the most elegant and user-friendly screen capture utilities out there, as long as you’re running **macOS Mojave (10.14) or newer**. If you are, you don’t need to download a thing.
The magic shortcut to memorize is **Command + Shift + 5**.
Pressing this brings up a control bar at the bottom of your screen. Let’s break it down. On the left, you’ll see icons for “Record Entire Screen” or “Record Selected Portion.” The second option is incredibly useful, letting you drag a box to frame just the part of the screen you want.
Now, the real power is in the “Options” menu on the right. Here you can choose where to save your file, set a 5 or 10-second timer to give yourself time to prepare, and select your microphone. One great feature is “Show Mouse Clicks,” which adds a visual circle effect every time you click, showing your viewers exactly what you’re doing.
One major point to be aware of: by default, this tool does **not** record your Mac’s internal system audio. Capturing sounds from a video or a game requires extra software, like a virtual audio driver.
Once you have everything configured, just hit the “Record” button. A small stop icon will appear in your Mac’s menu bar at the top of the screen. Click that to end the recording. A thumbnail will pop up in the corner; you can click it to trim the video or just let it save. For more complex edits, you can always use iMovie, which is also free on every Mac.
Section 4: How To Screen Record on a Chromebook For Free
For a long time, Chromebooks were the odd one out. But starting with Chrome OS version 89, Google built a fantastic screen capture tool right into the operating system.
You can launch it in two ways. The fastest is the keyboard shortcut: **Shift + Ctrl + the Show Windows key** (the key on the top row that looks like a rectangle with lines). Alternatively, click the time in the bottom-right corner to open your Quick Settings panel, and you’ll see a “Screen capture” button.
A small toolbar will pop up. First, make sure you’ve toggled it to video mode (the camcorder icon). Then, choose whether you want to record the full screen, a partial section, or a specific window.
Now, for the best part. Click the “Settings” gear icon on that toolbar. Here, you can toggle your microphone on. On many modern Chromebooks, you will also see a toggle for your front-facing camera. If you enable this, a small, circular video feed of you from your webcam appears in the corner of your recording! This is a fantastic feature for tutorials and presentations that often requires more advanced software on other operating systems. The availability of the webcam overlay can depend on your specific device and ChromeOS version, but it’s a game-changer when present.
Once you’re set, click to start recording. A red icon will appear on your Shelf at the bottom. To stop, just click that icon. You’ll get a notification, and your video will be waiting in your “Downloads” folder as a WEBM file, ready to be uploaded to YouTube or Google Drive.
Section 5: The “Pro-Level” Free Solution for Everyone: OBS Studio
The built-in tools are fantastic for quick jobs. But what if you need more? What if you want to add custom graphics, a professional webcam frame, or switch between your screen and a full-screen camera view? What if you need to record for hours in high resolution with no watermarks?
For that, we turn to the king of free recording and streaming software: OBS Studio.
**Part 5.1: What Is OBS and Why Is It Worth It?**
OBS, or Open Broadcaster Software, is a free and open-source program for Windows, Mac, and Linux. It’s the industry standard for live streamers, but its recording power is just as impressive. With OBS, you get no watermarks, no time limits, and total control over your recording. All for free.
I’ll be honest, the first time you open OBS, it can look intimidating. But I promise, a simple 5-minute setup will unlock all the power you need.
**Part 5.2: Safe Download and First-Time Setup**
First, and this is critical: only download OBS from its official website, **obsproject.com**. Run the installer. The very first time you launch it, an Auto-Configuration Wizard will pop up. Don’t skip it. Choose the option **”Optimize just for recording, I will not be streaming.”** This is key. It will automatically apply the best settings for high-quality recordings. Accept the defaults for resolution and FPS, and click “Apply Settings.”
**Part 5.3: Understanding Scenes and Sources**
You’re now looking at the main OBS window. Think of it like this:
* The big black rectangle is your **Canvas**—it’s what your audience sees.
* The **”Scenes”** box is for different layouts. You could have one scene for your tutorial and another for a close-up of your webcam.
* The **”Sources”** box is where the magic happens. Sources are the elements you add to your scene: your screen, your webcam, your microphone, images, etc.
**Part 5.4: Your First Pro Recording**
Let’s build a classic layout: your full screen, your webcam, and your microphone.
* **Step 1: Add Your Screen.** In the “Sources” box, click the “+” button and select **”Display Capture.”** Click OK, then OK again. Your screen will appear on the canvas. You can drag the red corners to resize it.
* **Step 2: Add Your Mic.** Click “+” in Sources again, and choose **”Audio Input Capture.”** In the properties window, click the “Device” dropdown and select your microphone. You should now see its audio meter moving in the “Audio Mixer” panel.
* **Step 3: Add Your Webcam (Optional).** Click “+”, select **”Video Capture Device,”** and choose your webcam from the device list. It will appear on your canvas, probably very large. Just click on it, resize it with the red corners, and drag it to a corner of the screen.
On Windows, OBS usually captures your computer’s audio automatically in a source called “Desktop Audio.” On a Mac, just like the built-in recorder, you’ll need extra software to route your system audio into OBS.
**Part 5.5: The One Setting You Should Know About**
By default, OBS often records in a format like MKV. This format is great because it protects your file if the recording crashes. However, many video editors prefer MP4. Here’s the professional workflow: record in MKV for safety, and then convert it to MP4 inside OBS.
After you record, go to the OBS menu bar and select **File > Remux Recordings**. Select your MKV file, and OBS will instantly create a safe, editor-friendly MP4 copy.
If you prefer to live dangerously and record directly to MP4, you can go to **Settings > Output**, and under the “Recording” tab, change the **Recording Format** to **MP4**. OBS will warn you about potential file corruption, but it’s an option for convenience.
You’re now ready. Hit “Start Recording” and “Stop Recording” in the bottom-right. You’ve just mastered the basics of the most powerful free recorder on the planet.
Section 6: Excellent Free Alternatives for Specific Needs
While the built-in tools and OBS cover most situations, two other types of tools are worth knowing about.
First is **ActivePresenter**. Think of it as a middle ground between the simple built-in tools and the professional power of OBS. Its free version is extremely generous, with no watermarks or time limits for most standard uses. Its biggest selling point is that it’s an all-in-one recorder and video editor. When you stop recording, it opens your project in an editor where you can easily add annotations, callouts, and zoom effects. This makes it an amazing choice for e-learning content or detailed software tutorials, but be aware some very advanced export options are reserved for the paid version.
Next are **browser extensions** like **Loom**. These are built for speed and sharing. You install the Chrome extension, click the icon, and start recording. The second you hit stop, the video is uploaded, and a shareable link is copied to your clipboard. It’s perfect for firing off a quick, under-five-minute explanation to a colleague. The free plans for these services change often, so always check their current limits, but for speed and ease of sharing, they are unbeatable.
Conclusion
And there you have it—the complete roadmap to recording your laptop screen for free.
Let’s recap. For a fast, simple recording with no downloads, use your laptop’s built-in tool. For Windows, that’s the **Snipping Tool** or **Xbox Game Bar**. For a Mac on Mojave or newer, it’s the **Screenshot Toolbar** (Cmd+Shift+5). And for Chromebook, it’s the **Screen Capture** tool.
When you’re ready to create professional content with full control and no limits, your answer is **OBS Studio**. The small learning curve is well worth the infinite power.
And if you need to create polished tutorials with built-in editing, check out **ActivePresenter**. If it’s all about sharing a clip as fast as possible, an extension like **Loom** is your friend.
You now have the knowledge and the tools to capture what you need, whenever you need it, on any laptop, for free.