You’ve seen them: the viral videos, the slick transitions, the perfectly-synced captions that make you stop scrolling. You want to create that same magic, tell your own story, and build your brand. But then you open a new video editor on your laptop, and that familiar feeling hits—you’re completely and utterly overwhelmed. A wall of buttons and panels stares back at you, and your creative vision suddenly feels a million miles away. Well, in this article, I’m going to give you the complete roadmap to not just *use* CapCut on your laptop, but to actually *master* it.
Forget the confusion and the frustration. This isn’t just another tutorial; this is your all-in-one guide to going from your first click to exporting professional-looking videos you can be proud of. We’re going to break down every single feature, step-by-step, in a way that actually makes sense. By the end of this, that overwhelming interface will feel like your personal creative playground. We’ll cover everything from the initial download, to the core editing workflow, all the way to advanced tricks that will make your videos stand out. So, if you’re ready to finally turn your ideas into incredible videos, you’re in the right place. Let’s get started.
Section 1: Getting Started: Installation and Setup
Before we can dive into the fun stuff, we need to get the software on your computer and set it up for success. Getting this right from the start will save you a ton of headaches down the line.
First, let’s talk about what your computer needs to run CapCut smoothly. You don’t need a Hollywood supercomputer, but there are some minimums. For both Windows and Mac, you’ll want at least 4 gigabytes of RAM, but honestly, 8 or even 16 gigs is what I’d recommend for a much smoother ride, especially with 4K footage. In fact, the Windows Store listing for CapCut suggests 8GB as the minimum, so that’s a good target. You’ll need a processor that’s at least an Intel Core i3 or an equivalent AMD chip, but an i5 or Ryzen 5 will make everything feel much faster. For storage, make sure you have at least 10 gigs of free space for the app and your projects. And while CapCut runs on integrated graphics, a dedicated graphics card with 2 to 4 gigs of VRAM will be a game-changer for rendering effects without lag. If you meet the recommended specs, you’re setting yourself up for a good time.
Now, let’s get it installed. You have two main options, but I strongly recommend the first: go directly to the official website. Open your browser and search for “CapCut official website.” This ensures you’re getting the legitimate, most up-to-date, and safest version. Once you’re there, you’ll see a big “Download for Windows” or “Download for Mac” button. Click that.
The installer will start downloading. It’s a pretty small file, so it shouldn’t take long. Once it’s finished, find the file—usually in your “Downloads” folder—and double-click it to start the installation. The installer will walk you through the rest. You’ll agree to the terms and choose where to install it. Just sticking with the default location is usually fine. Once it’s done, the CapCut icon should pop up on your desktop or in your applications folder.
The other method, for Windows users, is downloading it from the Microsoft Store. Just open the store, search for “CapCut,” and hit “Install.” This way is also safe and simple.
Once it’s installed, go ahead and launch the app. CapCut will ask you to sign in using a Google, TikTok, or Facebook account. While you can poke around without an account, signing in is what unlocks the full power of the app—letting you remove the default watermark and access cloud features. Don’t worry, it’s free. With that done, you’ll land on the main project screen. Click that big “Create project” button, and let’s finally jump into the editor.

ILIPUTER- International Computer Manufacturing Company
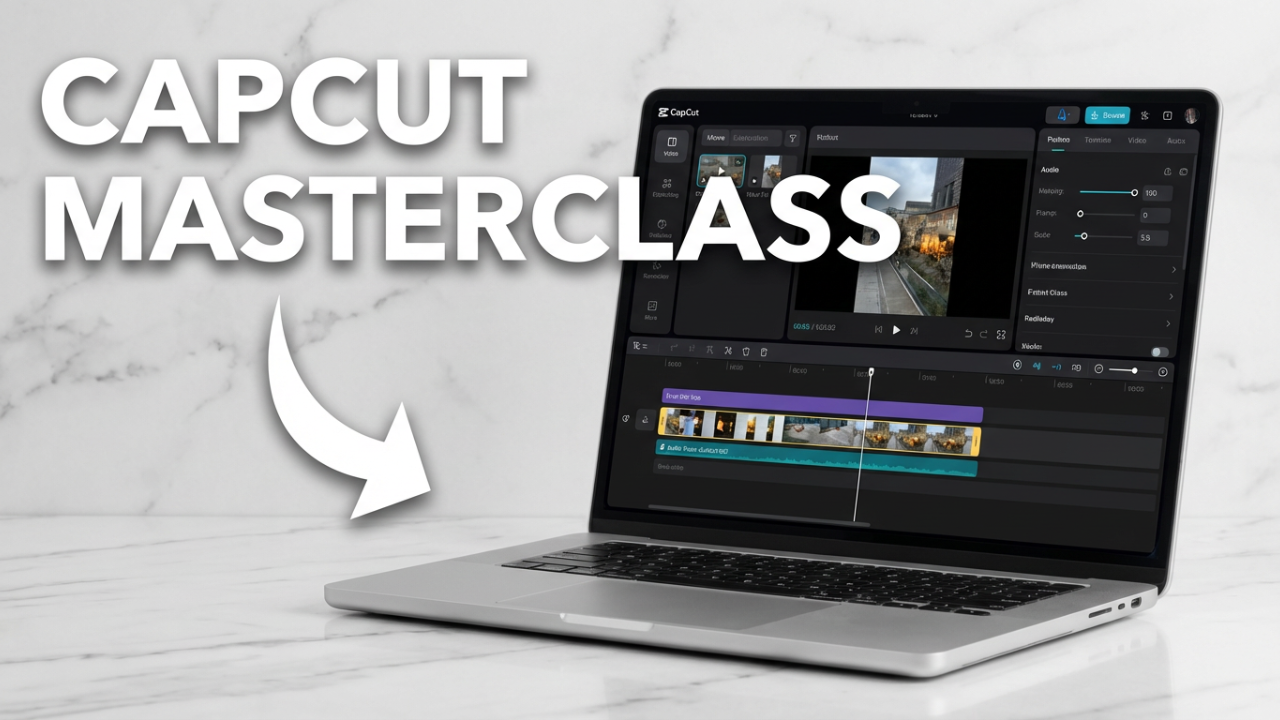
Section 2: The Grand Tour: Understanding the CapCut Interface
Okay, here we are: the main editing workspace. It might look like a lot at first glance, but I promise it’s simpler than it seems. The interface is logically split into four main sections, and once you know what each one does, the whole process will just click.
Let’s start in the top-left corner. This is your **Media Panel**. Think of this as your digital toolbox for the project. Every video clip, audio file, song, sound effect, and image you want to use will live here after you import it. Along the top of this panel, you’ll see tabs for Media, Audio, Text, Stickers, Effects, and more. This is your main menu for grabbing all the creative elements you’ll need. We’ll be coming back here a lot. For now, just remember: top-left is where you gather your ingredients.
Now, look at the big window in the center of the screen. This is your **Preview Window**, or Player. It does exactly what you think: it shows you what your video looks like at any given moment. As you make edits, this window gives you a real-time preview of your final product. That vertical white line that moves when you play the video is the **playhead**. Where the playhead sits on the timeline below determines what you see in the preview window. This connection is fundamental to editing.
Speaking of which, that huge horizontal area across the bottom of the screen is the **Timeline**. If the Media Panel is your toolbox, the timeline is your workbench. This is where you actually build your video. You’ll drag clips from the Media Panel down into the timeline to start piecing your edit together. The timeline reads from left to right, from beginning to end. Here, you’ll arrange clips in order, stack them to create layers, trim them to the perfect length, and add all your music and sound effects. This is where you’ll spend most of your time making precise cuts.
Finally, look to the top-right. This is your **Details Panel**, or Inspector. This panel is context-sensitive, which is just a fancy way of saying it changes depending on what you’ve selected on your timeline. Click a video clip, and this panel shows you options for its size, position, and rotation. Select a piece of text, and this panel transforms to show you fonts, colors, and animations. Click an audio track, and you’ll see volume controls. This is your command center for fine-tuning every single element.
So, to recap the flow: You import assets into the **Media Panel** (top-left). You build with them on the **Timeline** (bottom). You watch the result in the **Preview Window** (center). And you tweak the details in the **Details Panel** (top-right). That’s it. That’s the entire workflow. Now that you know the layout, let’s get our hands dirty and build a video.
Section 3: Building Your First Video: The Core Editing Workflow
This is where the fun really begins. We’re going to walk through creating a video from scratch, following the same logical order that pro editors use.
Step 1: Importing Your Media
First things first, we need to get our raw footage into CapCut. Go to the Media Panel in the top-left and click the big “Import” button. A file browser will pop up, letting you find your video clips, images, and audio files on your computer. You can select one file at a time or hold down Shift or Control (Command on Mac) to grab multiple files at once. Click “Open,” and you’ll see everything appear in the Media Panel.
Now that your assets are ready, it’s time to add them to the timeline. Simply click and drag your main video clip from the Media Panel down into the timeline area. And just like that, the foundation of your video is laid.
Step 2: Basic Timeline Editing: Trimming and Splitting
Rarely is a raw video clip perfect. You’ll almost always have unwanted parts at the beginning, end, or a mistake in the middle. The single most important skill in video editing is cutting away the fluff to leave only the good parts.
You’ll do this in two main ways: trimming and splitting.
**Trimming** is just shortening a clip. Move your mouse to the very edge of a clip on the timeline, and your cursor will change to a bracket icon. Click and drag the edge of the clip inward to trim away the unwanted footage. You can do this from the start or the end. Best of all, it’s non-destructive, meaning you can always drag the edge back out if you cut too much.
**Splitting** is how you cut a clip into two pieces, which is perfect for removing a mistake in the middle. Move the playhead (that white vertical line) to the exact spot you want to cut. Then, you can either click the “Split” icon in the timeline toolbar (it looks like a razor) or use the keyboard shortcut: Ctrl+B on Windows or Command+B on Mac. Now you have two separate clips. To remove a mistake, make one split before it and another split after it. This isolates the bad take. Simply click that middle clip and hit the Delete or Backspace key. Poof, it’s gone. Then just drag the clips together to close the gap.
Mastering trimming and splitting is the foundation of all editing. Spend some time getting comfortable with this; it’s what you’ll be doing most often.
Step 3: Adding B-Roll and Overlays
Your A-roll is your main footage, like someone talking to the camera. B-roll is all the supplemental footage you cut to, which makes your video more dynamic and helps illustrate what’s being said.
To add B-roll, just drag another video clip from your Media Panel onto the timeline, but place it on the track *above* your main A-roll. CapCut automatically creates a new layer. Now, for its duration, the clip on the top track will cover the clip on the bottom one. You can trim and split this B-roll just like any other clip. This is perfect for cutaways. For instance, if your A-roll is you talking about coffee, your B-roll could be a close-up shot of coffee beans.
You can use this same layering technique for picture-in-picture effects. Drag a clip to an upper track, select it, and then go to the Details Panel on the right. Use the “Scale” slider to shrink it and the “Position” controls to move it into a corner. This is great for reaction videos or showing gameplay.
Step 4: Working with Text and Titles
Let’s add some text. Go to the navigation bar above the Media Panel and click the “Text” tab. You’ll see tons of templates. To start simple, just drag the “Default Text” element onto a new track in your timeline above your video.
With the text element selected, the Details Panel on the right becomes a text editor. Here, you can type what you want and browse a huge library of fonts, change the size, color, and style. You can also add a stroke, background, or shadow to make your text really pop.
Below the basic settings, you’ll find the “Animation” tab. This lets you make your text appear and disappear with style. CapCut gives you “In,” “Out,” and “Loop” animations. “In” controls how it enters, “Out” controls how it leaves, and “Loop” plays for the text’s entire duration. You can also adjust the speed of these animations to get the timing just right.
Step 5: The Magic of Auto-Captions
This is easily one of CapCut’s most powerful features, especially for social media content. Instead of manually typing out every word you say, CapCut can do it for you automatically.
Just click the “Text” tab, and look for the “Auto-captions” sub-tab. Click it, choose the language of your video, and hit “Create.” CapCut will analyze your audio and, after a few moments, generate a new text track with everything transcribed and perfectly synced.
It’s a massive time-saver, but it’s not always 100% perfect. You’ll want to watch through and check for any typos. If you find one, just click that caption clip on the timeline, and correct the spelling in the Details Panel on the right. You can even select all the caption clips at once to apply the same font and style to everything, keeping it all consistent.
Step 6: Adding Transitions and Effects
Transitions help you move smoothly from one clip to the next. A classic beginner mistake is to overuse them, but when applied tastefully, they add a lot of polish.
Navigate to the “Transitions” tab. You’ll find a huge library sorted into categories. Hover your mouse over any of them to see a quick preview. When you find one you like, drag it down and drop it right on the cut between two clips. You can select the transition and go to the Details Panel to adjust its duration. Honestly, a simple cross-dissolve or fade is often all you need.
Effects and Filters work pretty much the same way. The “Effects” tab has everything from subtle lens flares to wild glitch animations. The “Filters” tab has color presets, like Instagram filters, that change the mood. Just drag and drop them onto a clip.
Step 7: Audio Editing and Adding Music
Audio is half the experience. Bad audio can absolutely ruin a great video. CapCut has simple but powerful tools to get it right.
First, let’s add background music. Go to the “Audio” tab, where CapCut has a built-in library of royalty-free music you can use. Find a track you like and drag it down to the timeline, where it will create its own audio track.
The most important thing is getting the volume right. You want music to support the video, not overpower the speaker. Click the music clip, and in the Details Panel, find the “Volume” slider. A good rule of thumb is to lower background music to around -15 to -25 dB whenever someone is talking.
You can also add sound effects from the “Sound effects” sub-tab. A simple “whoosh” when text appears on screen can add a surprisingly professional touch.
If your main audio has background noise, CapCut has a one-click fix. Select your main audio clip, go to the Details Panel, find the “Audio” tab, and toggle on “Noise reduction.” This can be incredibly effective at cleaning up your sound.
Step 8: Color Correction and Filters
The final touch is color. This is what separates flat, amateur footage from video that looks vibrant and professional.
The easiest method is using Filters, but for real control, you’ll want to do a manual color correction. Select a clip, go to the Details Panel, and find the “Adjustment” or “Color” tab.
Here you’ll find basic sliders for Brightness, Contrast, and Saturation.
* **Brightness:** Controls the overall lightness or darkness.
* **Contrast:** The difference between the light and dark areas. Bumping this up adds “punch.”
* **Saturation:** Controls the intensity of the colors. Increase it to make colors more vibrant, but be careful not to make skin tones look unnatural.
Playing with just these basic sliders can make a world of difference.
And with that, you’ve done it. You’ve imported footage, cut it down, added B-roll, titles, and captions, mixed your audio, and corrected your color. You now have a fully edited video.

ILIPUTER Made Laptop
Section 4: Unlocking Pro Features
Once you’re comfortable with the basics, you can start playing with some of the more advanced features that create those dynamic effects you see in viral videos.
The Power of Keyframes
If there is one “pro” feature you need to learn, it’s keyframing. Keyframing is the secret to animating literally anything—a clip’s position, its size, its rotation, even audio volume. A keyframe is just a marker that tells CapCut: “at this exact moment, I want this property to have this specific value.”
Let’s try a simple zoom-in:
1. Select a clip and move your playhead to where you want the zoom to *start*.
2. In the Details Panel, next to “Scale” and “Position,” you’ll see a small diamond icon. This is the “Add Keyframe” button. Click it. You’ve just told CapCut to remember the clip’s size and position at this point in time.
3. Now, move the playhead forward to where you want the zoom to *end*.
4. Back in the Details Panel, just increase the “Scale” slider. CapCut will automatically add a new keyframe for you.
Now, if you play that section back, you’ll see the clip smoothly animates between the two keyframes. You can use this exact process to make text slide across the screen or have a picture-in-picture element slide into view. Keyframing is the foundation of motion graphics.
Advanced Speed Control: Speed Ramping
Instead of making an entire clip fast or slow, speed ramping lets you create dynamic speed changes within a single clip. Select a clip, go to the “Speed” tab in the Details Panel, and click “Curve.” You’ll find presets like “Montage” or “Bullet,” but the real power is in “Custom.” Here, you can drag points on a line up to speed up that part of the clip or down to slow it down. This is how you create those popular slow-to-fast-to-slow effects.
Background Removal: Cutout & Chroma Key
CapCut has incredible AI tools for removing backgrounds. Select a video clip of a person. In the Details Panel, go to “Video” and then the “Cutout” sub-tab. Click on “Auto cutout.” With a single click, the AI will try to remove the background, leaving just the person. It works surprisingly well.
For traditional green screen footage, you can use the “Chroma Key” tool in that same section. Toggle it on, use the color picker to select the green in your Preview Window, and then adjust the “Strength” slider to fine-tune the result. This lets you place your subject anywhere you want.
Section 5: Fixing Common Problems
Even the best software has bad days. Knowing how to troubleshoot common issues will save you a lot of frustration.
Problem: Laggy Playback and Performance Issues
If your video is stuttering during playback, especially with 4K footage, your computer is likely struggling to keep up. CapCut has a built-in solution for this called **Proxy**. In the top right of the Details Panel, click the “Modify” button for your project. Go to the “Performance” tab and turn on “Proxy.” This tells CapCut to create low-resolution copies of your files to use for editing, which makes everything much smoother. Don’t worry—when you export, CapCut uses the original, full-quality files. This is a lifesaver for less powerful laptops.
Problem: App Crashes or Freezes
First, try the classic IT solution: close other applications that might be hogging your computer’s resources. Second, the issue could be a corrupted cache. The cache is where CapCut stores temporary files. In CapCut’s main settings menu, find the “Cache” section and you’ll see an option to clear it. This can often solve a lot of mysterious crashing problems.
Problem: Export Fails or Gets Stuck
If your video won’t export, the most common culprit is a lack of hard drive space. Video files are big, so make sure you have more than enough free space before you start. Try to have at least 1GB of free space. If that’s not it, the problem could be a specific effect or corrupted clip. Try exporting just a small section of your timeline to see if you can isolate the problematic element. And of course, sometimes a simple computer restart is all it takes to fix a stubborn export.
Section 6: Exporting Your Masterpiece
You did it. The video is edited and ready for the world. This final step, exporting, is crucial for making sure your video looks as good on YouTube or TikTok as it does in your preview window.
Click the blue “Export” button in the top-right corner. This opens the Export settings.
Here’s a quick breakdown of what matters:
Title & Export to: Give your file a name and choose where to save it.
Resolution: For most social media, **1080p** is the gold standard, offering a great balance of quality and file size. If you filmed in 4K and want the absolute best quality for YouTube, choose **4K**. Just never export at a higher resolution than you filmed in—it won’t add quality, it just makes the file bigger.
Frame Rate (fps): This should almost always match the frame rate of your original footage. 30fps is standard, while 60fps gives you that extra smooth motion for things like sports or gaming.
Format: In 99% of cases, **MP4 (with the H.264 codec)** is the way to go. It offers great quality with manageable file sizes and is compatible everywhere.
Bitrate: This controls data and quality. CapCut simplifies this to a “Quality” setting. Choosing “Higher” or “Recommended” is usually your best bet.
Before you hit that final button, check one last thing. CapCut sometimes adds a default outro clip with its logo at the very end of your timeline. Click on it and press delete to remove it.
Once your settings are good and the outro is gone, click “Export.” The time it takes will depend on your video’s length and your computer’s power. Once it’s done, your video is ready to upload.
Conclusion
And that’s really it. That’s the A-to-Z of using CapCut on your laptop. We’ve gone from the initial download and a tour of the interface, through the entire core editing workflow, and even into some pro-level features and troubleshooting.
That overwhelmed feeling we talked about at the start? Hopefully, it’s now been replaced with a feeling of empowerment. You now have the knowledge and the roadmap to turn your ideas into compelling, professional-looking videos. The wall of buttons has been broken down, and you can see the clear path from raw footage to a finished product.
The most important thing you can do now is start. Open CapCut, import some footage, and just make something. Your first video won’t be perfect, and that’s okay. Every time you edit, you’ll get faster, more confident, and more creative.