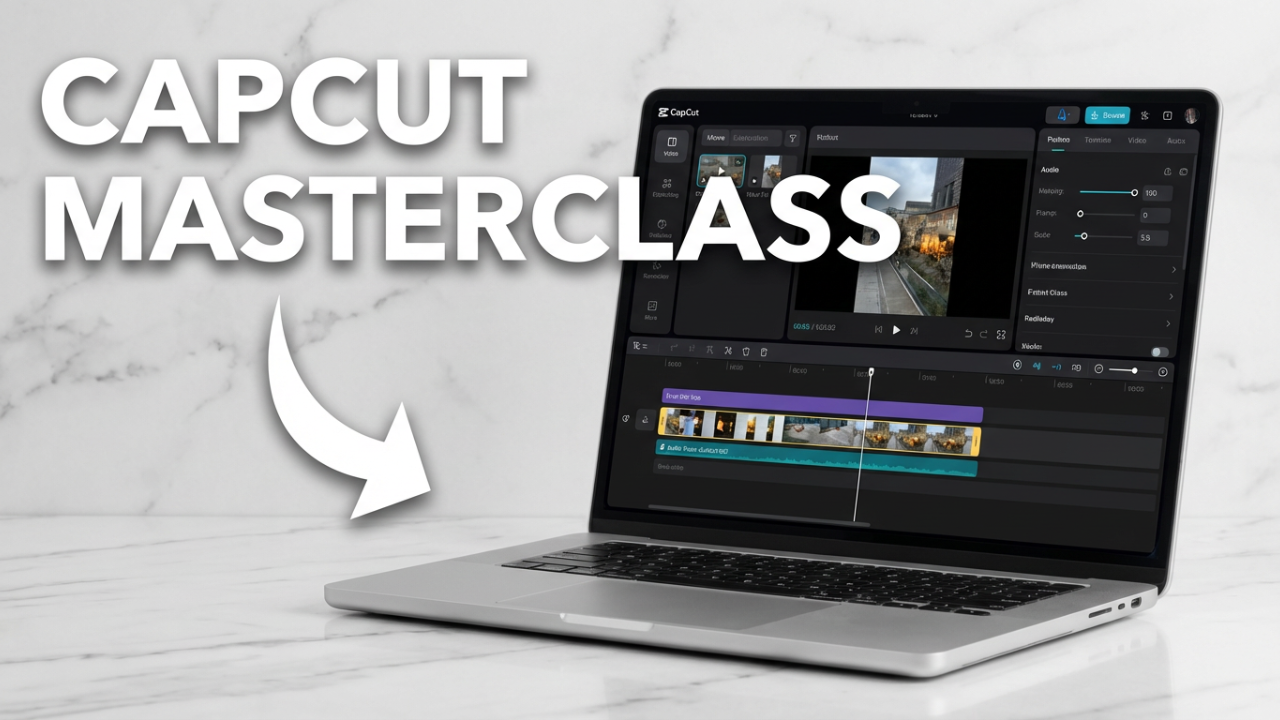
Title: How To Install CapCut In Laptop A Simple Guide
—
**Title: How To Install CapCut In Laptop A Simple Guide**
**Intro**
So, you want to get CapCut’s awesome editor on your laptop but don’t know where to start? Stick around, because I’m about to show you the two simplest and safest ways to install CapCut on your Windows or Mac computer, completely free. We’re going to cover everything from the official website download to the super-easy Microsoft Store method. By the end of this, you’ll have the full desktop version of CapCut running perfectly, ready to completely change your editing game.
**Hook**
Let’s be real—editing high-res video on a tiny phone screen is frustrating. Your fingers are always in the way, making precise cuts is nearly impossible, and your phone gets blazing hot right before it crashes. Maybe you’ve tried the web version, only to find it lags or just doesn’t have what you need. You know there has to be a better way. You want the power, stability, and big-screen convenience of a desktop editor without paying for expensive software. That’s why you’re here. This is the guide that cuts through the noise and gets CapCut running on your laptop, whether you’re using a new Windows 11 machine or a trusty MacBook.
**The “Why”: Unlocking the Power of CapCut on Desktop**
Before we jump into the installation, let’s talk about *why* this is such a good move. It’s about so much more than just a bigger screen; it’s about getting access to a more professional and efficient process that the mobile app just can’t offer.
First, performance and stability. The desktop version of CapCut is built to use your computer’s processor, RAM, and graphics card. This means it can handle big 4K files and complex projects with lots of layers without the constant fear of crashing—a nightmare for mobile editors. Exporting long videos is also way faster and more reliable on a PC or Mac.
Next up is precision and control. Editing with a mouse and keyboard is a game-changer. You can make frame-perfect cuts, adjust keyframes with pinpoint accuracy, and navigate a multi-track timeline so much more easily than on a touchscreen. Keyboard shortcuts alone will dramatically speed up your workflow, turning repetitive tasks into instant actions. This is the kind of control that makes a video look polished and professional.
Then there are the features themselves. While the core tools are consistent across platforms, using them on a desktop is a whole different experience. The sophisticated multi-track timeline is essential for complex projects with B-roll, multiple audio tracks, and layered effects. Tools like advanced color grading and keyframe animation just perform better and offer more refined control with a mouse. Plus, file management is actually simple. You can import whole folders, organize your clips, and easily find your project files, which is a huge step up from the chaotic file systems on mobile devices.
Finally, there’s offline access. Unlike the browser version, the desktop app lets you work on your projects without being connected to the internet. While some things like cloud syncing or downloading new effects still need you to be online, the main editing tools are always ready to go, giving you the freedom to edit wherever you are.
In short, installing CapCut on your laptop takes your editing from a hobby to a serious creative workflow. You get a faster, more stable, and more precise environment, giving you the power to bring your best video ideas to life.
**Section 1: The Foundation – Checking Your System Requirements**
First things first, let’s make sure your laptop is actually ready to run CapCut smoothly. A quick check now can save you a ton of frustration later, because running this software on an underpowered machine can lead to lag, crashes, and just a bad time. ByteDance has laid out clear requirements to make sure it works as it should.
Let’s break down what you need.
**For Windows Users:**
To run CapCut on a Windows laptop, you absolutely need a 64-bit version of the operating system. This is a big deal—it will not run on older 32-bit systems.
* **Minimum Requirements:** This is the baseline to get the app running. You can do basic edits, but you might see slowdowns with complex projects or 4K files.
* **Operating System:** Windows 10 or Windows 11 (64-bit only). Forget Windows 7 or 8; they aren’t officially supported.
* **Processor:** An Intel Core i3 or an equivalent AMD processor.
* **RAM:** At least 4GB of RAM. Video editing loves RAM, so 4GB is the absolute floor.
* **Graphics:** An integrated GPU, like Intel HD Graphics 5000 or newer, will get the job done.
* **Storage:** You’ll want at least 10GB of free disk space for the app, your project files, and the cache.
* **Recommended Requirements:** For a smooth editing experience, especially with 4K video or a lot of effects, you’ll want to aim for these specs.
* **Operating System:** Windows 10 or Windows 11 (64-bit).
* **Processor:** An Intel Core i5 or AMD Ryzen 5 processor, or something even better. This will really speed up rendering and playback.
* **RAM:** 8GB is highly recommended, and 16GB is the sweet spot for handling big files and advanced edits without any lag.
* **Graphics:** A dedicated graphics card (GPU) with 4GB or more of VRAM, like an NVIDIA GeForce GTX series or an equivalent AMD Radeon card. This makes a huge difference.
* **Storage:** A Solid-State Drive (SSD) is a fantastic upgrade over a traditional hard drive. It makes loading the app and your media files way faster.
**How to Check Your Windows Specs:**
It’s easy.
1. Click the **Start Menu**.
2. Type “About your PC” and hit Enter.
3. A window will pop up showing your **Processor**, installed **RAM**, and **System type** (this tells you if you have a 64-bit OS).
4. To check storage, open **File Explorer**, click “This PC,” and you’ll see the free space on your drives.
**For macOS Users:**
CapCut is also nicely optimized for Macs, including both older Intel models and the new ones with Apple Silicon chips (M1, M2, M3).
* **Minimum Requirements:**
* **Operating System:** macOS 10.15 (Catalina) or later. While some say 10.14 might work, stick with 10.15 for guaranteed compatibility.
* **Processor:** Any decent dual-core processor will work for basic edits.
* **RAM:** 4GB of RAM is the minimum, but just like with Windows, more is always better.
* **Storage:** The app itself needs a couple of gigabytes, but you should have at least 10GB of free space to be comfortable with your projects and media.
* **Recommended Requirements:**
* **Operating System:** The latest version of macOS your machine can handle (like Sonoma or Sequoia).
* **Processor:** Any Apple Silicon chip (M1, M2, M3) will give you an incredibly smooth experience. For Intel Macs, a Core i5 or better is what you want.
* **RAM:** 8GB of memory is great, and 16GB is perfect for professional-level work.
* **Graphics:** The integrated graphics on modern Macs are pretty powerful, especially on Apple Silicon chips.
**How to Check Your macOS Specs:**
1. Click the **Apple icon** in the top-left corner.
2. Select “About This Mac.”
3. A window will show your Mac model, **Processor**, **Memory (RAM)**, and macOS version.
4. Click the “Storage” tab to see your available space.
If you meet the minimum specs, you’re good to go!
**Section 2: The Official Website Method (Windows Installation)**
This is the most direct and recommended way to install CapCut on Windows. Downloading straight from the source ensures you get the latest, safest version of the software without any weird third-party stuff. Let’s walk through it step-by-step.
**Step 1: Go to the Official CapCut Website**
First, open your favorite web browser—Chrome, Firefox, Edge, whatever you use.
In the address bar, type the official URL: **capcut.com**. It’s really important to make sure you’re on the right site. Double-check that it says “capcut.com” and has a little padlock icon next to it, which means it’s secure. This is your first defense against fake sites.
**Step 2: Find and Download the Installer**
Once the homepage loads, you should see a big, obvious button that says **”Download for Windows”**. It’s usually right in the middle of the page or in the top-right corner.
Click that button. Your browser will start downloading the installer file, which will be named something like **”CapCut_Setup.exe”**. The file size is usually between 200MB and 600MB, so it might take a minute depending on your internet speed. You can watch the progress in your browser’s downloads section.
**Step 3: Run the Installer**
Once the download is finished, you need to find that file. It’s almost always in your **”Downloads”** folder. Open File Explorer, click “Downloads” on the left, and you’ll see it.
Now, to avoid any permission issues, it’s a good idea to run the installer as an administrator. **Right-click** on the “CapCut_Setup.exe” file and choose **”Run as administrator”**. A window might pop up asking for permission; just click “Yes.”
The CapCut installer will launch.
1. **Agree to the Terms:** First, you’ll need to agree to CapCut’s terms of service. Just tick the checkbox to continue.
2. **Customize (Optional):** Before you click install, look for a “More” or “Customize installation” option. This lets you change where CapCut is installed. The default location is fine for most people. You’ll also see an option to **”Create a desktop shortcut”**—I’d leave that checked so it’s easy to find later.
3. **Install:** Click the big **”Install”** button. The installer will start doing its thing, and you’ll see a progress bar. It’s usually very fast, often taking less than a minute.
4. **Finish:** Once it’s done, you’ll see a confirmation. The CapCut app might even launch automatically.
Congrats! You’ve just installed CapCut on your Windows laptop. You should see the icon on your desktop, ready to go.
**Section 3: The Official Website Method (Mac Installation)**
Installing CapCut on a MacBook is just as easy, though it uses a different type of file called a disk image. Again, using the official website gets you the real, up-to-date version.
**Step 1: Go to the Official Website and Download for Mac**
Open a browser on your Mac, like Safari or Chrome. Carefully type in the official website: **capcut.com**. Always double-check the URL to make sure it’s the right one.
The website is pretty smart and should detect you’re on a Mac. Look for a button that says **”Download for Mac”**. Click it to start the download. On a Mac, you’ll be downloading a **.dmg** file, which will be named something like “CapCut_Downloader.dmg”.
**Step 2: Open the DMG and Install the App**
Once the download is done, go to your **”Downloads”** folder in Finder. Find the .dmg file and **double-click** it. Your Mac will “mount” it, making it appear like a temporary hard drive. A new Finder window will pop up.
Inside, you’ll usually see two things: the **CapCut app icon** and a shortcut to your **Applications folder**.
The installation on a Mac is famously simple: just **click and drag the CapCut icon and drop it right onto the Applications folder icon** in that same window.
This copies the app into your main Applications folder where all your programs live. You’ll see a quick progress bar, and then it’s done.
**Step 3: First Launch and Permissions**
After it’s copied, CapCut is officially installed. You can now “eject” the mounted disk image by dragging it to the Trash can in your Dock.
To launch CapCut, open your **Applications** folder and double-click the CapCut icon.
The very first time you open an app from the internet, your Mac’s security, Gatekeeper, will show a warning. Since we got it from the official site, you can confidently click **”Open”**. CapCut might also ask for permission to access your folders (like Documents or Downloads) so it can import your videos. You’ll need to grant those permissions.
And that’s it! CapCut is now installed on your Mac. You can drag its icon to your Dock for quick access.
**Section 4: The Microsoft Store Method (Windows Only)**
For Windows 10 and 11 users, there’s another incredibly simple and secure option: the Microsoft Store. Installing from here has the nice bonus of handling updates automatically and making uninstalls super clean.
**Step 1: Open the Microsoft Store**
First, open the Microsoft Store app. It’s already on your laptop.
1. Click the **Start Menu**.
2. Type **”Microsoft Store”**.
3. Click the shopping bag icon that appears to launch the app.
**Step 2: Search for CapCut**
In the store, use the search bar at the top and type **”CapCut”** or **”CapCut Video Editor”**, then hit Enter.
You should see the official CapCut app pop up. To make sure you’ve got the right one, check that the developer is listed as **ByteDance Pte. Ltd.** and that it has the familiar logo and good reviews.
**Step 3: Install CapCut from the Store**
Click on the CapCut app to go to its product page. You’ll see a blue button that says **”Install”** or **”Get”**. Click it.
The Microsoft Store takes care of everything from here—downloading and installing automatically. You’ll see a progress bar, and it’s usually done in just a few minutes. You don’t have to deal with any installer files yourself.
**Step 4: Launch the Application**
Once it’s done, the “Install” button will turn into an **”Open”** button. You can click that to launch CapCut right away.
Otherwise, you can find CapCut in your **Start Menu** just like any other app. When you open it for the first time, it might run a quick “environment test” to optimize itself for your PC, and then you’re ready to start editing.
**Section 5: Post-Installation – First Launch and Quick Tour**
No matter which method you used, CapCut is now on your laptop. Let’s fire it up and take a quick look around so you know where to start.
**First Launch Experience**
Find the CapCut icon and double-click it. The first time you open it, CapCut might run a quick performance test to analyze your computer’s hardware. This is a one-time thing and happens automatically, so just let it finish. You’ll then have to agree to the user agreement to continue.
**The Sign-In Screen (Optional but Recommended)**
Next, you’ll likely see a home screen prompting you to sign in. You can log in with a **TikTok, Google, or Facebook account**.
While you can often start a project without signing in, I really recommend it. Logging in gives you access to CapCut’s cloud storage, which lets you back up your projects and even sync them between your computer and your phone. Plus, in some cases, you need to be logged in to export your video without a watermark.
**A Quick Tour of the Main Interface**
The CapCut desktop interface is clean and easy to understand.
1. **The Project Hub:** This is the first screen you’ll see. It has a big **”+ New Project”** button right in the center—that’s how you’ll start every video. Below that, you’ll see a list of your recent projects so you can jump back into an edit.
**Starting a New Project: The Editing Workspace**
Click the **”+ New Project”** button to get to the main editing screen. It’s usually split into four key areas:
1. **Media and Effects Panel (Top-Left):** This is your library. You’ll find the all-important **”Import”** button here to bring in your video clips, images, and music. This is also where you’ll find CapCut’s huge library of **Audio, Text, Stickers, Effects, and Transitions**.
2. **Preview Window (Top-Right):** This is where you watch your video as you build it. You can play, pause, and see your edits in real-time.
3. **Timeline (Bottom):** The timeline is the heart of the editor. This is where you’ll arrange your clips, trim them down, layer B-roll, add text, and sync your audio. It gives you precise control over everything.
4. **Details Panel (Far Right):** When you click on a clip or effect in your timeline, this panel wakes up. It shows you all the settings you can change—like a video’s size and position, audio volume, or text color.
And that’s it! You now have a working installation of CapCut and know your way around. You’re ready to import your first clip and start creating.
**Section 6: In-Depth Troubleshooting Guide**
Even with an easy install, things can sometimes go wrong. If you hit a snag, don’t worry. Here’s a guide to fixing the most common problems.
**Problem 1: The Installer Won’t Launch or Gets Stuck**
You downloaded the installer, but double-clicking it does nothing, or the progress bar just freezes.
* **Solution A: Run as Administrator (Windows):** This is the most common fix. The installer might need extra permissions. Right-click the `CapCut_Setup.exe` file and choose **”Run as administrator”**.
* **Solution B: Temporarily Disable Antivirus:** Sometimes, your antivirus software can get a little overprotective and block the installer. Try disabling it for a few minutes, run the installer, and then—this is important—turn your antivirus back on immediately after.
* **Solution C: Redownload the Installer:** The download file might have been corrupted. Just delete the file you have, clear your browser’s cache, and download a fresh copy from capcut.com.
* **Solution D: Check for a “Ghost” Install:** If the installer says CapCut is already there but you can’t find it, a piece of an old, failed installation might be stuck. Go to “Add or remove programs” in your Windows settings, find CapCut, and uninstall it. Then restart your computer and try installing again.
**Problem 2: “No Internet Connection” Error Inside the App**
You installed CapCut, but it says “No Internet Connection” even though your browser is working fine.
* **Solution A: Update the App:** This is often a bug in an older version. Check for updates in the app itself or in the Microsoft Store/Mac App Store. Keeping the app updated fixes a lot of random issues.
* **Solution B: Check Your Firewall:** Your firewall might be blocking CapCut from connecting to its servers. Go into your firewall settings and make sure CapCut is on the “allowed” list.
* **Solution C: Turn Off Your VPN or Proxy:** CapCut can sometimes have trouble with VPNs. If you have one on, try turning it off completely and restarting the app.
* **Solution D: Flush Your DNS Cache (Advanced):** Your computer keeps a cache of IP addresses that can sometimes become outdated.
* **On Windows:** Open Command Prompt as an administrator and type `ipconfig /flushdns`, then hit Enter.
* **On Mac:** Open Terminal and type `sudo dscacheutil -flushcache; sudo killall -HUP mDNSResponder`, then hit Enter.
**Problem 3: Poor Performance, Lagging, or Crashing**
The app runs, but it’s slow, the preview stutters, or it just crashes.
* **Solution A: Check Your System Requirements Again:** Go back to Section 1. If you’re on a machine that only meets the minimum specs, you’re going to have a tough time with 4K video or lots of effects. Try closing other programs, especially web browsers with tons of tabs open.
* **Solution B: Update Your Graphics Drivers:** Outdated graphics drivers are a huge cause of poor editing performance. Go to the NVIDIA, AMD, or Intel website and get the latest drivers for your specific graphics card.
* **Solution C: Use Proxies:** CapCut has a built-in proxy feature for this exact problem. It creates low-res copies of your video files for smooth editing, then switches back to the high-quality originals for the final export. Look for it in the project settings.
* **Solution D: Clear the App Cache:** Over time, CapCut builds up a lot of temporary files. In the app’s settings, you should find an option to clear the cache. This won’t delete your projects, but it can make the app much snappier.
**Problem 4: Finding and Backing Up Your Project Files**
You want to back up your project files but don’t know where CapCut hides them. They are saved in a specific system folder:
* **On Windows:** The projects are usually here (you may need to enable “Show hidden items” in File Explorer’s View tab):
`C:\Users\[YourUsername]\AppData\Local\CapCut\User Data\Projects`
* **On Mac:** Open Finder and go to:
`~/Movies/CapCut/User Data/`
You can copy the folders inside to back them up or move them to another computer.
**CTA (Call to Action)**
And there you have it! You’ve successfully installed the full desktop version of CapCut. You now have a powerful and free video editor ready for anything. If this guide helped you out, a quick thumbs-up would be amazing—it really helps the channel. And for more CapCut tutorials, from beginner basics to advanced tricks, be sure to subscribe so you don’t miss out.
**Conclusion**
We’ve gone over everything from checking your system specs to installing CapCut on both Windows and Mac. We’ve also taken a quick tour of the interface and covered how to troubleshoot any issues that pop up. The power of desktop editing—with all its precision and stability—is now yours.
Got any questions about the installation, or is there a specific CapCut feature you want me to cover next? Drop a comment below! I read all of them. Now go launch CapCut, import some footage, and start creating something awesome. Thanks for watching, and I’ll see you in the next one.